


Enterprise Resource Planning (ERP): The Backbone of Modern Business Operations
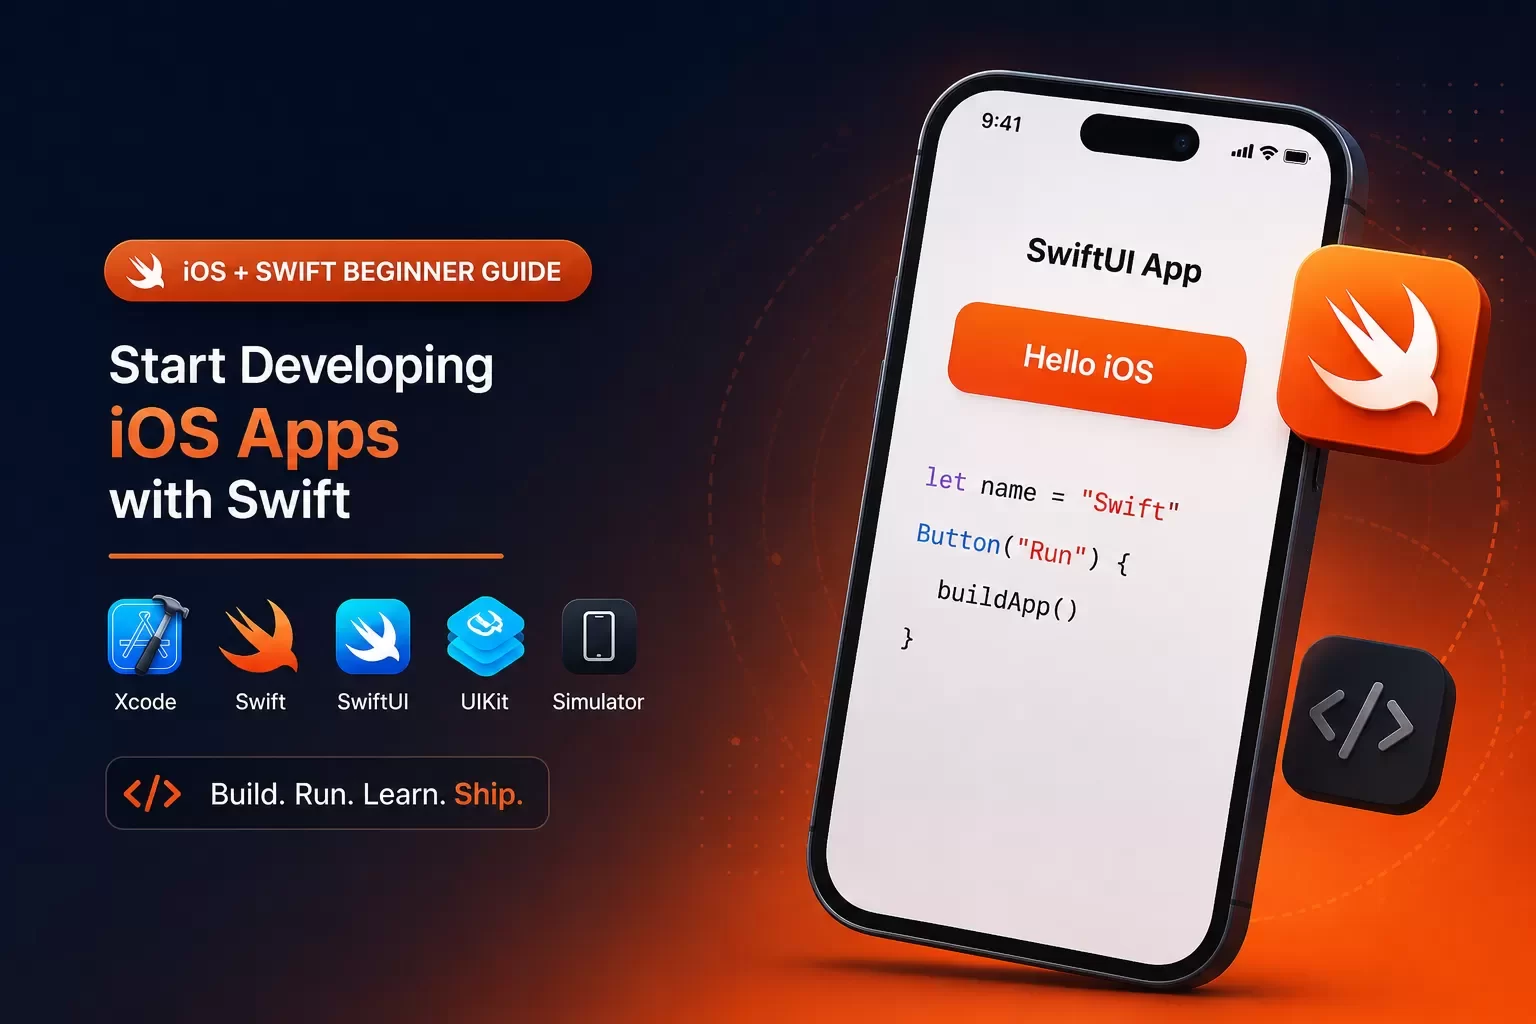
Swift is beginner-friendly, powerful, and central to Apple app development. The fastest way to learn is to set up Xcode, build a simple interface, connect code to user actions, and keep improving through real projects.
Developing iOS apps with Swift is becoming more valuable. Employment of software developers is projected to grow 15% from 2024 to 2034[18]. Apple created Swift in 2014[19] and designed it to be beginner-friendly[19]. The language offers impressive performance compared to others[20]. Many beginners learn the fundamentals in just two weeks[3]. This swift mobile app development guide will walk you through setting up Xcode (Apple's free development environment)[21] and learning Swift programming basic concepts. You will build your first iOS app interface and learn SwiftUI tutorial resources to advance your skills.
Setting Up Your iOS Development Environment
Download and Install Xcode
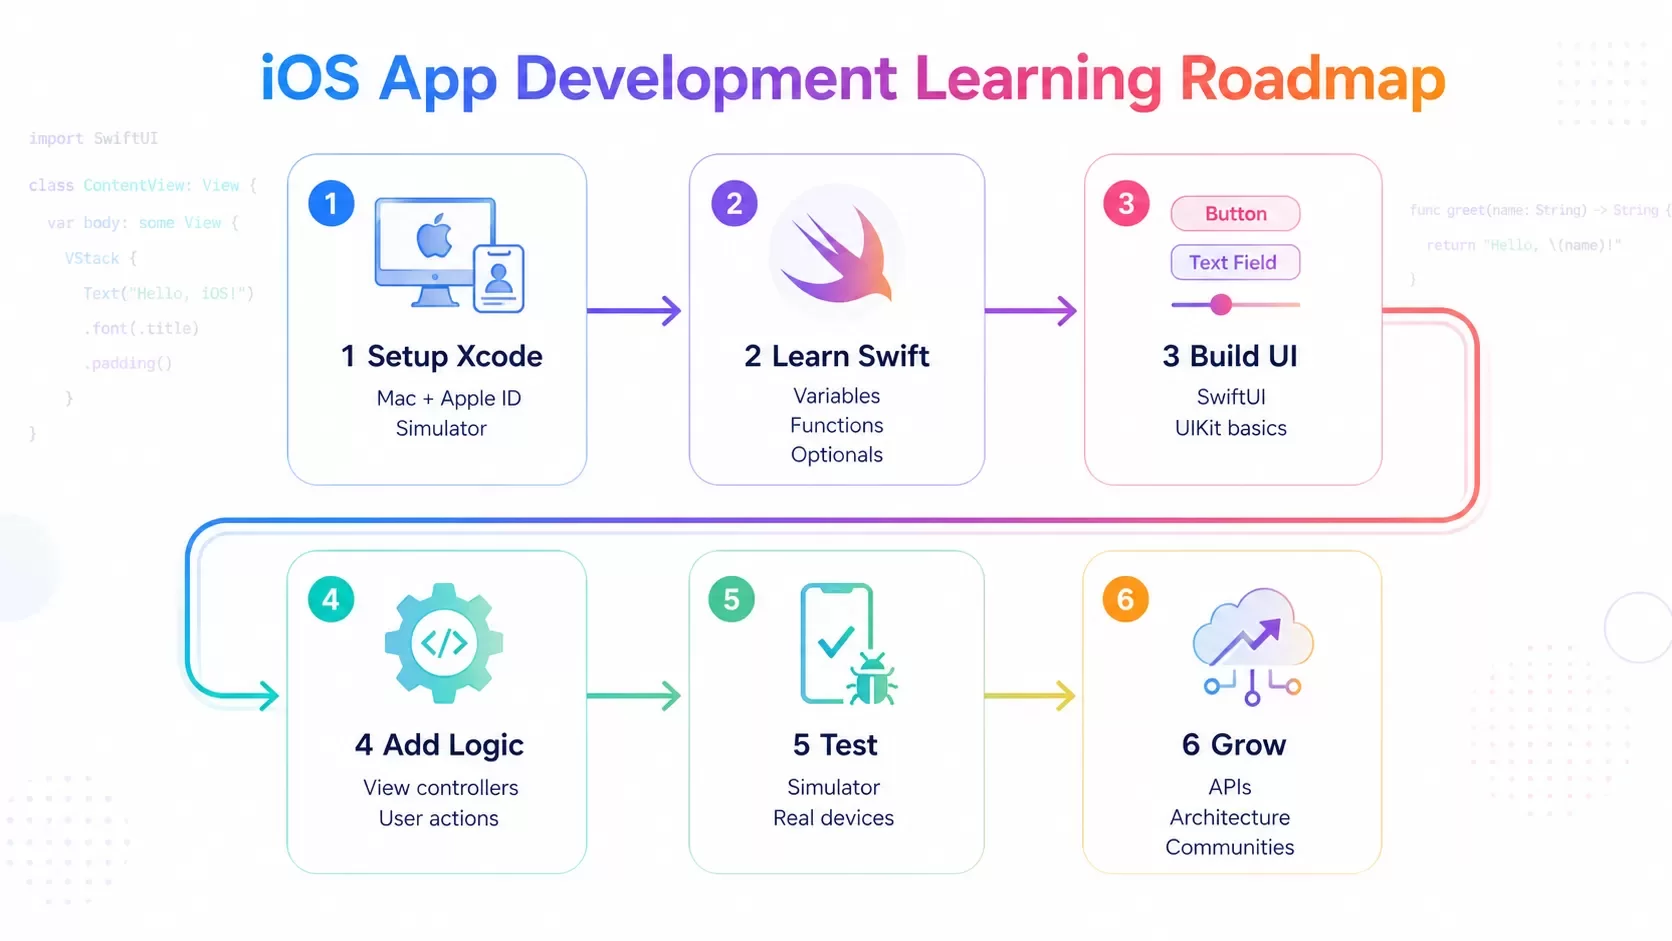
Xcode runs only on Mac computers, so you'll need a Mac running macOS to start developing iOS apps with Swift. The software downloads for free from the Mac App Store and has everything needed for iOS app development. Open the App Store on your Mac, search for "Xcode," and click the Get button to begin downloading. Storage space is something you should consider. The installation requires 10-15 GB of available disk space[18], though newer versions like Xcode 26 may need around 40GB[1]. Then check your available storage before starting the download. You'll also need a free Apple ID to download Xcode and access its features.
The installation process is straightforward after that. Once the download completes, open the Xcode installer and drag the Xcode icon to your Applications folder. Launch Xcode from Applications, agree to the terms and conditions, and sign in with your Apple ID. The software may prompt you to install additional components required for iOS development. Accept them to ensure full functionality.
Understanding the Xcode Interface
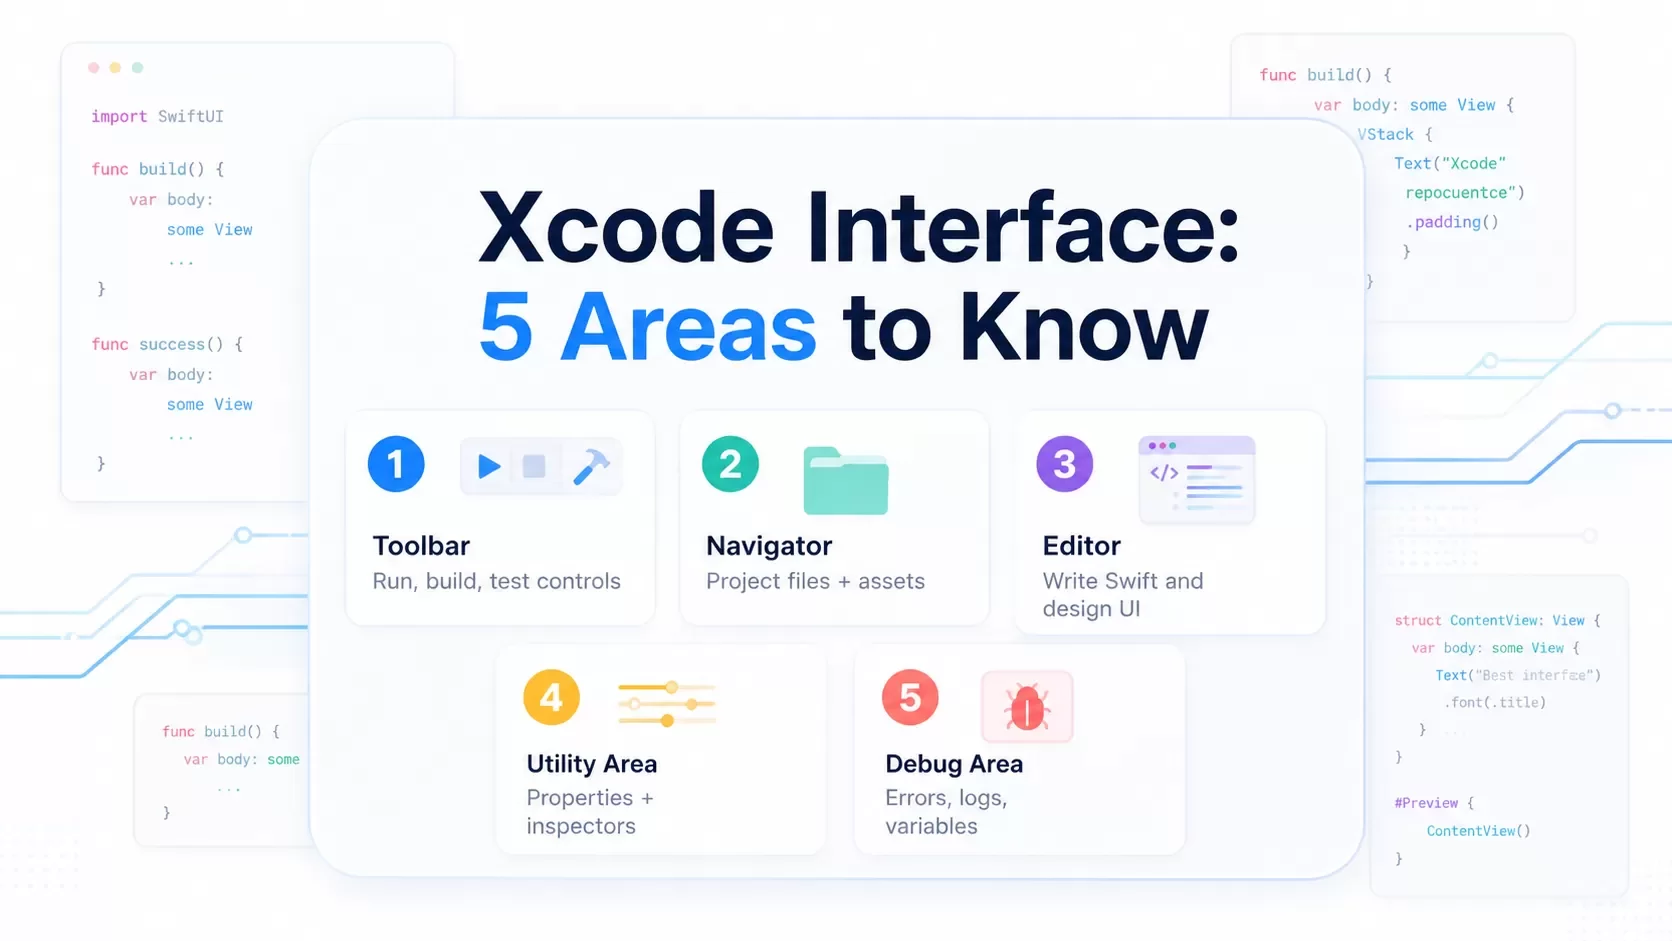
The Xcode interface appears complex at first glance, but everything falls into five main areas that work together: Toolbar at the top has the Run button and project controls for building and testing your app Navigator on the left displays all project files including Swift code files, image assets, and configuration settings[18] Editor in the center is where you write code and design interfaces, serving as your primary workspace[18] Utility Area on the right shows details about selected elements and provides access to additional tools Debug Area at the bottom helps identify and fix problems by showing error messages, variable values, and program output[18] You can toggle each area on its own using icons at the top-right of the toolbar. When focused on writing code, hiding the navigator and utility area gives you more screen space. When designing user interfaces, you'll want them visible. The project navigator shows your application's file structure. Yellow folders represent groups (logical groupings that only exist in Xcode), while blue folders are actual directories on your disk. This organization helps you move through files while learning Swift programming.
Creating Your First Swift Project
When you create a new Xcode project, select "Create a new Xcode project" from the welcome screen. Xcode provides templates with built-in methods for different app types. Start with a simple app template for beginners. One decision you'll face right away is choosing between SwiftUI and Storyboards for your interface. Choose SwiftUI[1] for 2026. Apple has made SwiftUI the default for new projects, and every new framework feature ships with SwiftUI support first[1]. Modern tutorials, courses, and development resources generate SwiftUI by default. Fill in your project name, organization identifier (formatted as com.yourname), and verify Swift is selected as the language. The iOS Simulator will let you test applications on virtual devices without physical hardware[18]. According to Apple Developer, Simulator makes rapid prototyping possible by testing apps across different Apple devices and operating system versions[18]. You can check button responses, screen transitions, and data display before deploying to real devices.
Learn Swift Programming Basics
Understanding Swift Syntax and Structure
Swift operates as a type-safe language. All variables and constants have known types at compile time that cannot be changed after declaration. This design prevents whole classes of unsafe code and makes your programs more predictable. The compiler checks variable types first. If no type is declared, Swift infers the type from the first assigned value. Semicolons are optional in Swift. You can write statements without semicolons at the end, and the compiler accepts both approaches. But if you place multiple statements on the same line, semicolons become required as delimiters between them. Whitespace separates different parts of statements. At least one whitespace character must exist between keywords and identifiers, though spaces between operators are optional for readability. Identifiers serve as names for variables, functions and other user-defined elements. They must start with letters A-Z, a-z, or an underscore, followed by any combination of letters, underscores and digits. Swift treats identifiers as case-sensitive, so userName and username represent two distinct variables.
Variables, Constants, and Data Types
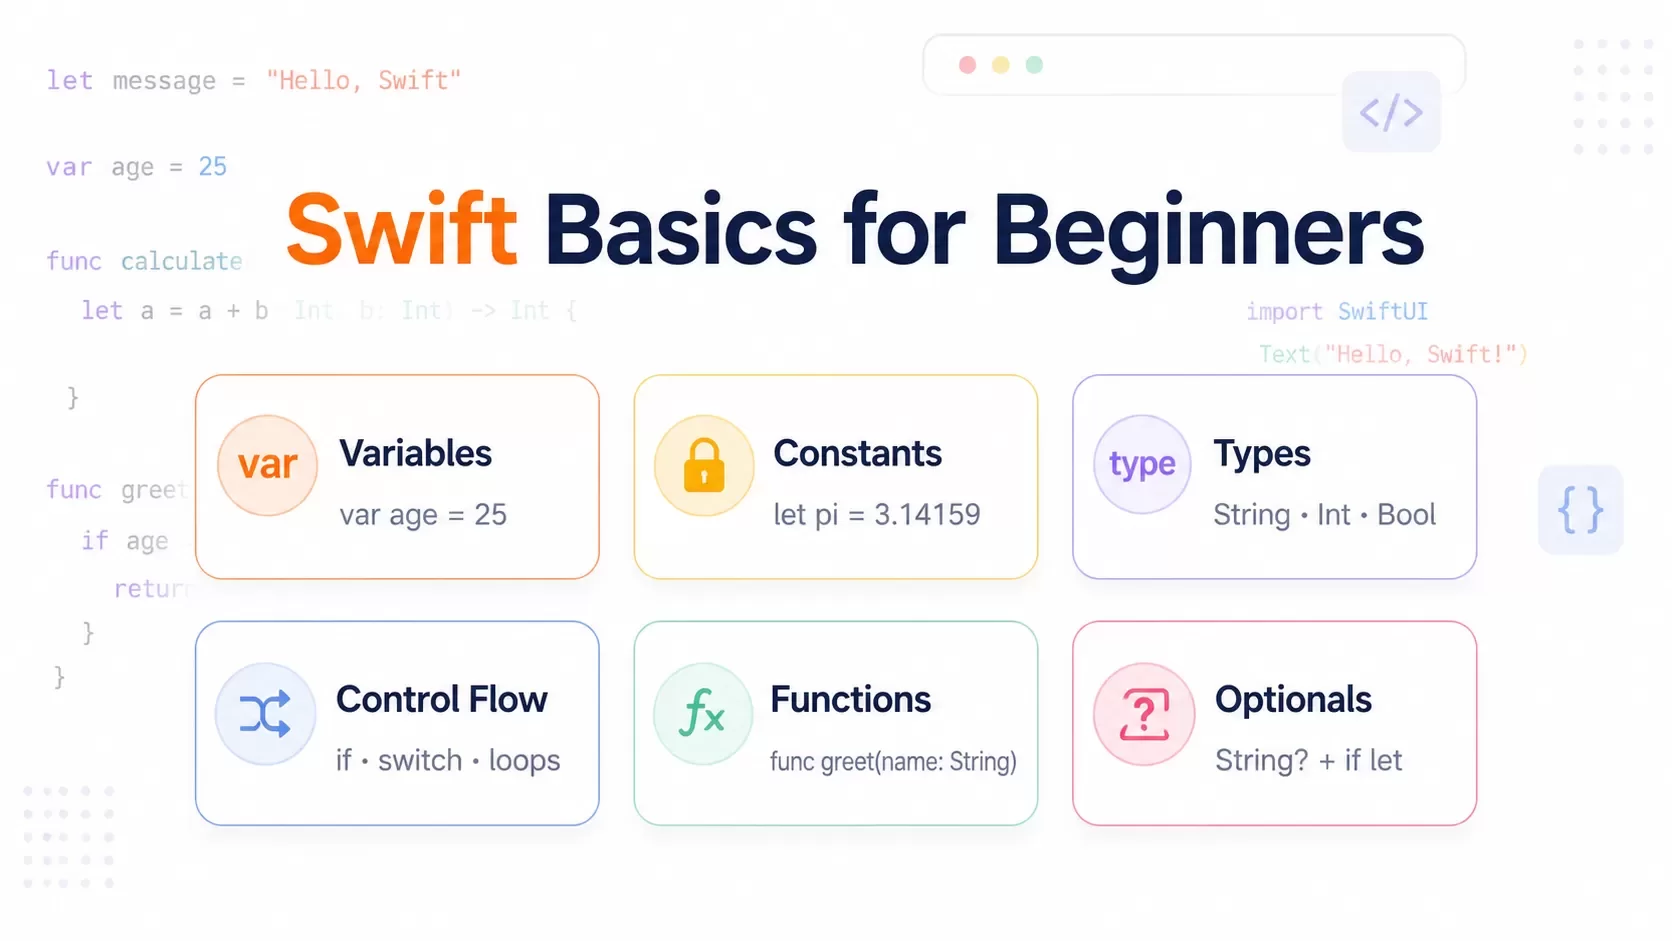
Variables store data that can change throughout your program, declared using the var keyword. Constants hold fixed values that cannot be modified after initialization, declared with the let keyword. Swift developers prefer constants wherever possible because they make code easier to understand and allow the compiler to apply performance optimizations. Swift provides several built-in data types. Int stores whole numbers without fractional components. String holds text enclosed in double quotes. Bool represents truth values as true or false. For numbers with decimal points, Double offers 64-bit precision while Float provides 32-bit precision. Character stores single characters. You declare types by adding a colon and type name after the variable name, or let Swift infer the type from the assigned value.
Control Flow and Functions
Control flow statements determine how code executes. The if statement runs code blocks only when conditions evaluate to true. You can extend it with else clauses for alternative paths or chain multiple conditions using else if. Switch statements provide cleaner alternatives to multiple if-else blocks. Swift makes your cases exhaustive by requiring a default case for open-ended values. Loops repeat code blocks based on specified conditions. The for-in loop iterates through collections or ranges. while loops check conditions before each iteration. repeat-while loops evaluate conditions after executing the code block. Functions group reusable code, declared using the func keyword followed by the function name, parameters in parentheses and an optional return type indicated by an arrow and type name.
Working with Optionals
Optionals represent a unique Swift feature that handles the absence of values. An optional type may contain a value or nil, declared by appending a question mark to the type. You must unwrap optionals before using their values. Force unwrapping with an exclamation mark extracts the value but crashes if the optional contains nil. Safer approaches include optional binding with if let, which unwraps the optional into a temporary constant only if a value exists. The nil-coalescing operator ?? provides default values when optionals are nil. Optional chaining uses a question mark after the optional to access properties and methods safely, returning nil if any part of the chain fails.
Simple Swift Programming Tutorial Examples
Starting with simple variable declarations helps solidify these concepts. Creating a variable with var age = 25 lets Swift infer the Int type, while let pi: Double = 3.14159 declares a constant. Control flow appears in practical scenarios like checking conditions with if age >= 18 to determine eligibility. Functions become powerful when they accept parameters and return values, transforming inputs into useful outputs for your iOS app development work.
Building Your First iOS App Interface
Introduction to UIKit Framework
UIKit serves as Apple's framework to develop user interfaces on iOS, iPadOS, and tvOS platforms[2]. The framework provides classes, protocols, and tools that enable you to create and manage visual elements while handling user interactions[3]. UIKit works naturally with SwiftUI and allows you to mix interface elements between both frameworks or implement parts of your UIKit app in SwiftUI[2]. The framework follows a Model-View-Controller software architecture, which separates your app's data, presentation, and logic into distinct components. This separation makes your code more maintainable as your iOS app development skills progress. UIKit has support for animations, text management, search functionality, and accessibility features that make your apps more inclusive.
Designing with Interface Builder
Interface Builder provides a visual environment within Xcode that simplifies designing app screens without extensive manual coding[3]. You access it by opening your project's storyboard file, which displays a canvas where you construct your interface. The tool offers a low learning curve and amateur-friendly experience that lets you quickly check what screens look like on different devices[4]. The Object Library has pre-made components you can drag onto your canvas. This visual approach lets you see immediate results when you change positions, sizes, colors, or other properties of interface elements[5]. Auto Layout helps create flexible and responsive UIs by defining relationships between components and their parent views. Your app adapts to different screen sizes and orientations this way[6].
Adding UI Elements to Your App
UIKit provides simple UI components that are your app's interface building blocks[6]. UIView acts as the base container, UILabel displays text, UIButton handles taps, and UITextField accepts user input. Drag these elements from the Object Library onto your canvas, then customize their properties using the Attributes Inspector. A simple interface setup involves positioning a UILabel and UIButton on your canvas. You configure the label's text and font through the Attributes Inspector, then set the button's title and background color[6]. The Size Inspector lets you define constraints for component positions and relationships with other elements, such as centering a label horizontally or pinning a button to the screen bottom.
Connecting Interface to Code with IBOutlets and IBActions
Outlets and actions link your app's UI elements to code that controls them[6]. An outlet connects code to a UI element and lets you access and modify its properties programmatically. An action connects a UI element to your code and allows responses to user interactions[7]. The Assistant Editor displays your storyboard and code side by side, which you need to create these connections[6]. Select a UI element, hold the Control key, and drag to your view controller's code file. Choose "Outlet" in the Connection dropdown and name it, then click Connect[6]. Create an action similarly by selecting "Action" instead and naming your method. The filled circles appearing next to your code indicate successful connections[7].
Writing Functional Swift Code for Your App
Implementing App Logic with Swift
View controllers serve as the central hub where your app's functionality comes to life. You organize logic within view controller methods that respond to specific events when developing iOS apps with Swift. The code you write determines how your app processes data, updates the interface and responds to user actions. Swift's clean syntax makes implementing app logic straightforward. Functions you create within view controllers can verify user input, perform calculations, update data models and trigger interface changes. Each piece of functionality should have a clear purpose and keep your code modular and testable as your swift mobile app development skills advance.
Working with View Controllers
Every view controller manages a view hierarchy through its view property[8]. The controller acts as the sole owner of its views and subviews. It's responsible for creating them and relinquishing ownership when appropriate[8]. View controllers follow a specific lifecycle with methods that iOS calls at designated times[9].
The viewDidLoad method runs once when the view loads into memory. This makes it suitable to set up things initially[9]. Before the view appears, viewWillAppear executes every time the view becomes visible. It's perfect to update dynamic content[9]. After that, viewDidAppear fires when the view transitions onscreen[9]. These lifecycle methods help you place code at the right execution points for optimal performance.
Handling User Interactions
Gesture recognizers detect user actions like taps, swipes and pinches[10]. A UITapGestureRecognizer provides button-like interactions and detects brief touches on the screen[10]. You attach gesture recognizers by code through calling addGestureRecognizer(_:) on your view, or through Interface Builder by dragging the appropriate object onto your view[10]. Tap gestures are discrete. They call your action method only when recognized[10]. Always check the gesture recognizer's state property before taking actions, even for discrete gestures[10].
Testing Your App in the Simulator
The iOS Simulator makes rapid testing possible without physical devices. You can use the Xcode debugger, set breakpoints and examine variable values when you run your app in the Simulator[11]. But Simulator apps use different compilers than device builds. This may cause different behavior[11]. Then always test on actual devices before deployment.
Next Steps in Your Swift Mobile App Development Journey
Learning SwiftUI Tutorial Resources
Apple provides SwiftUI Essentials tutorials that teach fundamental features through hands-on practice in Xcode[12]. These tutorials guide you through creating views and customizing layouts for complex interfaces[12]. The Design Pathway offers guidance on laying out views and configuring them with precision[12]. Apple's Human Interface Guidelines provide design principles for layouts in any platform[[12].
Working with APIs and Networking
URLSession handles network communication in Swift apps and supports GET and POST requests with async/await syntax[13]. You fetch data using URLSession.shared.data(from:) and decode responses with JSONDecoder[13]. RESTful APIs enable your app to communicate with external services and retrieve or send data naturally[14]. Encode your payload with JSONEncoder, set the request method, and configure headers appropriately for POST requests[13].
iOS App Development Best Practices
Architectural patterns like MVC, MVP, and MVVM separate your app logic into manageable components[15]. MVVM works well for larger applications by organizing code into smaller chunks[15]. Write clean, well-structured code that follows Swift coding standards[15]. Adhere to Apple's Human Interface Guidelines for intuitive and available designs[15]. Full testing using XCTest framework confirms component behavior and supports reliability[15].
Learning Resources and Communities
Swift.org provides source code, development builds, and forums for the open-source Swift community[16]. Apple Developer Forums connect you with Apple engineers and fellow developers[16]. Hacking with Swift offers free tutorials covering SwiftUI and UIKit through real-world projects[17].
Conclusion
You now have everything you need to start your iOS development experience with Swift. We've covered the foundation, from setting up Xcode and understanding the interface to writing functional code and testing your first app. The learning curve might seem steep at first. Swift's beginner-friendly design makes it accessible to beginners though. Start building right away rather than waiting until you feel completely ready. Your first apps won't be perfect, and that's fine. Practice regularly and experiment with different features. Explore the learning resources we've shared. Your iOS development skills will improve with each project you build. Stay committed to learning and you'll see progress faster than you expect.
FAQs
Yes, it's absolutely possible to learn iOS development from scratch, even without any programming experience. Many successful developers started with no technical background. The key is to follow structured tutorials, practice consistently by building real apps, and use resources like ChatGPT or online communities when you get stuck. Most beginners can grasp the fundamentals within a few weeks to months, depending on their dedication and learning pace.
Swift is the programming language you use to write code for iOS apps, while SwiftUI is a framework that helps you build user interfaces. Think of Swift as the language itself, and SwiftUI as a set of tools and components that make creating app screens easier. For new projects in 2026, SwiftUI is recommended as Apple has made it the default choice, and most modern tutorials and resources focus on SwiftUI development.
The timeline varies significantly depending on the app's complexity and your prior experience. A simple app with basic functionality can take anywhere from a few days to a month for a beginner following tutorials. More complex apps with advanced features might require several months. Many developers create their first publishable app within 3-4 months of starting their learning journey, though simpler practice apps can be completed much faster.
No, you don't need to pay anything to start learning. Xcode is completely free to download from the Mac App Store, and you can build and test apps in the iOS Simulator without any cost. You only need the Apple Developer Program membership ($99/year) when you're ready to publish your app to the App Store or test on physical devices beyond basic development.
For beginners starting in 2026, SwiftUI is the recommended starting point. It's more modern, easier to learn, and Apple prioritizes it for new features and frameworks. SwiftUI has a gentler learning curve and allows you to see visual results quickly, which helps maintain motivation. While UIKit knowledge is valuable for professional development roles, SwiftUI provides a better foundation for those creating their own apps or just starting out.
Need a custom iOS app or mobile product built?
Hexagon IT Solutions designs and develops mobile apps, APIs, CRM-connected workflows, and custom software for businesses that need scalable digital products.
References
[1]https://codewithchris.com/xcode-tutorial/
[2]https://developer.apple.com/documentation/uikit
[4]https://holyswift.app/how-to-start-ios-development-career-part-3-building-user-interfaces/
[5]https://matteomanferdini.com/ios-storyboards-xcode/
[6]https://daily.dev/blog/build-your-first-ios-app-with-uikit-beginners-guide/
[7]https://www.swiftdevjournal.com/introduction-to-mac-development-connecting-ui-elements/
[8]https://developer.apple.com/documentation/UIKit/UIViewController
[9]https://stackoverflow.com/questions/5562938/looking-to-understand-the-ios-uiviewcontroller-lifecycle
[10]https://developer.apple.com/documentation/uikit/handling-tap-gestures
[12]https://developer.apple.com/swiftui/get-started/
[13]https://www.w3schools.com/swift/swift_networking_urlsession.asp
[15]https://www.kanakinfosystems.com/blog/ios-app-development-best-practices
[16]https://developer.apple.com/swift/resources/
[17]https://www.hackingwithswift.com/
[19]https://www.coursereport.com/blog/how-to-learn-swift-for-ios
[20]https://www.techaheadcorp.com/blog/swift-programming-for-ios-app-development/


